
Having compelling, original photos is an important part of storytelling. Photos can help you connect with your audience on an emotional level. Stock photos are great in a pinch (when you pick them properly) but if at all possible, you should use your own, original photos to add authenticity to your content. While copy is critical for search engines, photos (and videos) are what really draw people in and help to shape the overall story for them.
The good news is that everyone is now an amateur photographer! Your smart phone usually has a decent enough camera and if you can afford to get a bit fancier of a camera (like my mirrorless Sony A6000 that I adore), photo taking has never been easier for the novice. Generally, automatic settings will take good enough photos that with slight edits will give your work a polished, professional vibe.
Let’s cover the basics! Tips for taking good photos:
Get a good camera (even if it’s an iPhone) – make sure you’re using equipment that you’re comfortable with. If you’re just starting out, an iPhone or smart phone with a good camera is generally OK. I recently upgraded to the iPhone X from the iPhone 6 and it made a huge difference, so if you are using a smart phone, I do recommend using an upgraded version. Like I said earlier, I prefer my Sony A6000 because it’s simple, small, lightweight, can take 1080 video, and I can add attachments like a remote flash and a gun microphone. Use what works for you!
Natural light does wonders Lighting is really important. You want to make sure that if you’re inside the light is shining on your subject, not behind them. Make sure any windows shine toward the subject’s face and that you don’t have any lamps or distracting light sources behind the subject’s frame. Outdoor lighting is GREAT for taking photos. The golden hours are generally near sunrise and just before sunset. If you get an overcast day, it’s like shooting in a soft box – nice even lighting that doesn’t drown out your subject. If it’s really sunny outside, you need to worry about shadows and overexposure.

Take the time to edit! Making slight edits to your photos is the trick to making them look professional. There are all kinds of programs and tools out there and it’s really just your preference and budget that should determine what you want to use. My personal favorite is Adobe Lightroom (which costs about $10-$12 a month).
These are the basic edits I do to almost every photo:
Crop – make sure the subject fill most of the frame. Add some room on the sides if you need to add text to the image or want to draw the viewer’s attention in a particular way.
Add saturation and contrast – this is totally a user-preference. I like my photos to be slightly more vibrant and colorful than the original photos that come out.
Soften – this makes your subjects have a slight halo-type effect. I think it makes them look a bit glowy (and generally smooths out some wrinkles).
Add vignette – I add a dark vignette to the frame that makes the subject really pop.
Use presets – the great thing about Lightroom is that you can download free “presets,” which are filters that you can apply to a photo in one click. They will make your edits the same across all photos so all you have to do is review the work and maybe adjust a few settings to your liking. You can also copy and paste your edits and create your own presets! ChadEveryday did a great, 4-minute tutorial on how to use them!
A word of caution…
Don’t over-edit– you want people to look natural and relatable. We all have wrinkles, sunspots, and blemishes so, when you edit every single one of those out it feels robotic and fake (but feel free to edit out boogers). My advice? Edit your photos slightly to make them intriguing and polished, but keep them real.
A few more tips!
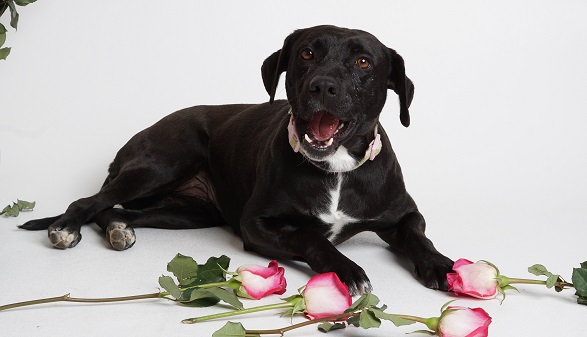
The soul is in the eyes! – I live by this piece of advice from my friend and photographer-mentor Albert Lewis. When you’re framing your subject, try to be at eye level with the person (or animal). When you look down on your subject, it minimizes them and give a feeling of smallness or objectifies them. Keep the shot at eye level and if you can use a studio flash, do it to make their eyes sparkle.
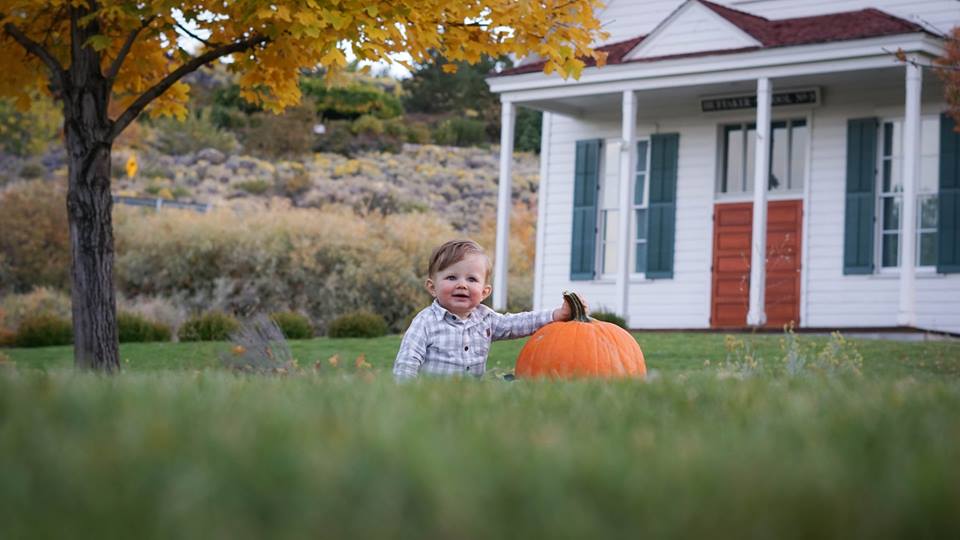
Be playful with your focus – Obviously you don’t want to subject to be out of focus but you can play around with the subject matter to make your shot more interesting. Perhaps put a little foreground in the shot before the subject to make it more interesting.
Camera Settings – if you’re new to photography and you have a good camera, then you can get away with a lot using the automatic setting (especially if you edit the photo afterward)! If you do want to practice with the manual settings, then you’ll need to know the basics of shutter speed, ISO, and Aperture. In very simple terms, ISO effects the brightness or darkness of your photos, and Aperture is like the pupil of your camera lens – it effects light and depth of your images. Shutter speed is how long your camera takes to capture an image. I really recommend PhotographyLife.com for more in depth information!
You call the shots! Whether you like it or not, when you’re behind the camera, you’re probably going to have to give your subjects direction. It’s pretty common for people to freak out a little when a camera is around so you should give them gentle reminders to be natural, to look at other people in the shot, to engage with the objects around them, and yes, you’ll probably have to remind them to smile (they often forget and you get a lot of confused looking people).
One and done? No. Take lots of photos – for every 20 pictures I take, about 1 of them is good (after editing). You have one opportunity to take as many photos of your subjects as possible so play around with angles, settings, and poses to ensure you’ll have plenty to choose from. There’s no harm in deleting bad pictures, but it’s much harder to go back and re-do an entire shoot.
Finally, some quick tips for use of your photos.
Verrrrrry briefly – when you’re ready to use your edited photos, be sure to caption them, add alt text, compress large images, and give credit to your subjects or event. Alt text is the alternative text for an image that you can add when posting to certain platforms. It’s a must with anything you’re posting to a blog or website because it allows those with disabilities to have a description of the photograph read to them so they get as rich of an experience with your content as anyone else. An added benefit? Google’s spiders crawl alt text so it will help with your Search Engine Optimization (SEO). When you’re using a real camera, your image will generally be a very large file, which can significantly slow down the load time of your site. Use an image compressor tool to make sure you don’t lose a lot of people who are unwilling to wait for your post to load (everyone’s time is valuable and we don’t have a lot to spend waiting these days)! Compressor.io is a free tool you can check out!
Those were some very basic tips for blog photography for beginners…what other questions do you have or would like me to dive into deeper? Let me know in the comments!
Sharing is caring
Thank you for reading! I love hearing from you so if you liked this post, found it helpful, or think I could improve it, please let me know.

2 Comments Add yours